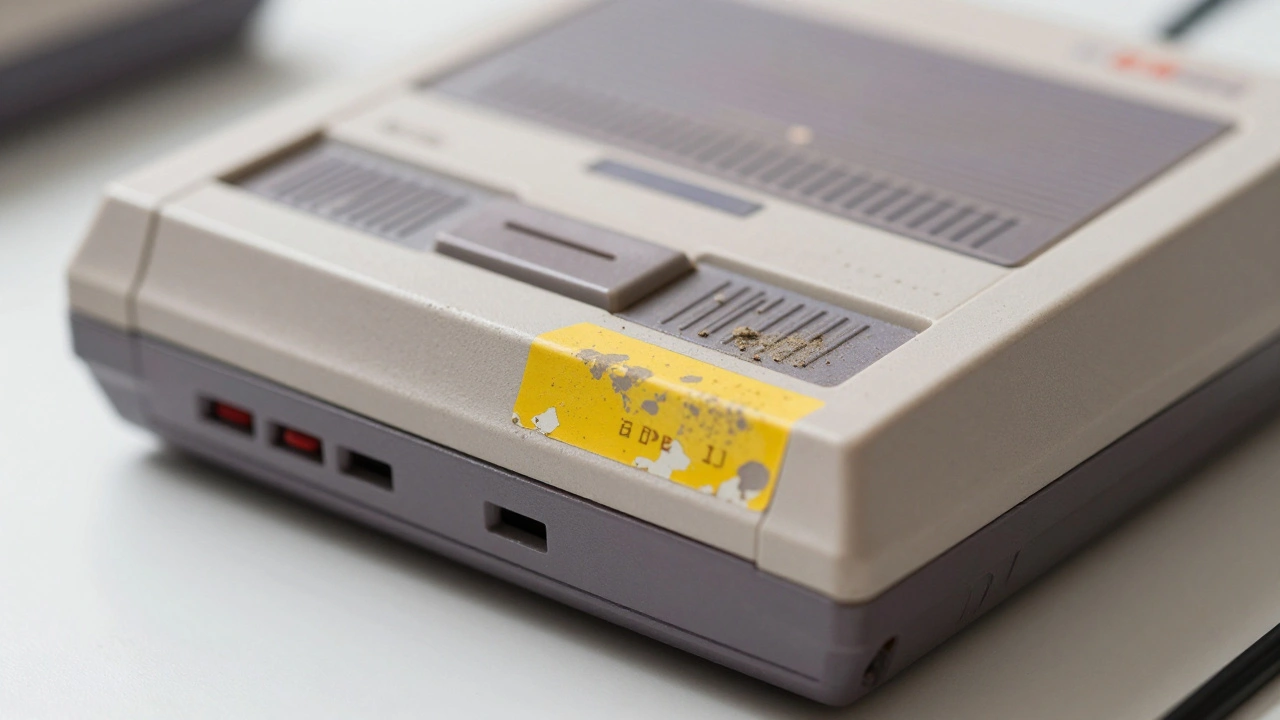
That price sticker on your vintage PlayStation or a retro Nintendo Entertainment System cartridge isn’t just an eyesore. It’s a layer of yellowing plastic that traps dust, attracts more dirt, and obscures the original artwork you paid good money for. But here is the hard truth: removing stickers from video game hardware and media is a high-risk operation. Do it wrong, and you will strip the paint off your console, melt the plastic of your case, or leave a permanent ghost of glue where the logo used to be.
I’ve seen collectors ruin pristine copies because they grabbed a bottle of acetone without testing it first. The goal isn’t just to get the sticker off; it’s to keep the item looking like it came out of the factory yesterday. Whether you are dealing with a modern Xbox Series X or a twenty-year-old Sega Genesis box, the method changes based on the material underneath. Let’s break down exactly how to do this safely.
The Golden Rule: Test Before You Treat
Before you touch any tool or chemical, you need to understand what you are working with. Video game accessories are made from various plastics-ABS, polycarbonate, PVC-and each reacts differently to heat and solvents. If you pour alcohol on a matte-finish controller, you might dull the texture permanently. If you use acetone on a clear plastic case jacket, you could cause crazing (tiny cracks) that makes the whole piece look cloudy.
Always start with the least aggressive method. That means mechanical removal first, then heat, and chemicals only as a last resort. Find a hidden spot-a corner of the back of the case, the bottom of the console near a screw hole-and apply your chosen method there. Wait ten minutes. If the surface looks unchanged, you are likely safe to proceed. If it gets sticky, discolored, or cloudy, stop immediately.
Method 1: The Heat Approach for Plastic Surfaces
Heat is your best friend when dealing with large, flat surfaces like the backs of game boxes or the outer shells of consoles. The idea is simple: soften the adhesive so it loses its grip without tearing the paper or plastic of the sticker itself.
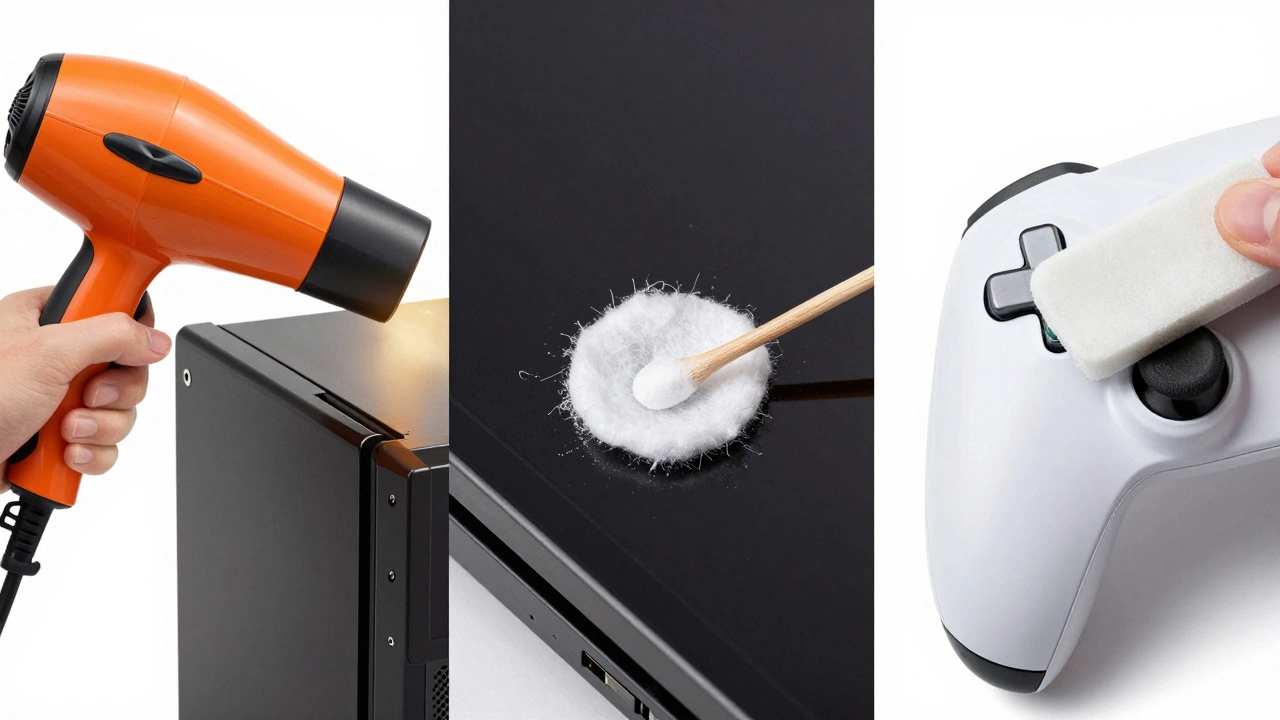
You don’t need a professional heat gun. A standard household hair dryer works perfectly. Set it to the lowest heat setting. Hold it about four to six inches away from the sticker. Move it in a circular motion for fifteen to thirty seconds. You want the sticker to feel warm to the touch, not hot enough to burn your finger.
- Apply heat evenly across the sticker.
- Use your fingernail or a plastic spudger to gently lift one corner.
- If the sticker resists, apply more heat. Never force it.
- Pull the sticker back slowly at a low angle, keeping the hair dryer moving over the area you just peeled.
This method works well for newer stickers on hard plastic cases. However, if the sticker tears, you will be left with residue. That’s when you move to the next step. Note that you should never use direct heat on printed front covers of game boxes. The ink can run, or the paper can warp. Stick to heat for the spine, back, and inside flaps.
Method 2: Chemical Solvents for Stubborn Residue
When the sticker comes off but leaves behind that annoying sticky film, you need a solvent. Not all solvents are created equal, and using the wrong one is the fastest way to destroy a collectible. Here is the hierarchy of safety:
- Isopropyl Alcohol (IPA): This is the safest starting point. Use 90% or higher concentration. Dampen a cotton swab or microfiber cloth-do not soak it. Gently rub the residue in small circles. IPA evaporates quickly and rarely damages most plastics.
- Goo Gone or Citrus-Based Cleaners: These are oil-based and very effective on heavy adhesives. They are safer than acetone but can leave an oily film that requires a second cleaning with water or IPA to remove. Test these on painted surfaces carefully, as oils can sometimes degrade certain paints.
- Acetone: This is the nuclear option. Acetone dissolves many types of plastic. It is great for metal screws or glass screens, but terrible for ABS plastic (used in most controllers and console bodies). Only use acetone on clear plastic case jackets, and even then, use extreme caution. Dip a cotton swab lightly and dab the residue. Do not let it sit. Wipe it away immediately.
Avoid nail polish remover unless you know it contains pure acetone and no other additives. Many commercial removers have oils and moisturizers that can stain porous materials like cardboard box interiors.
Method 3: Mechanical Removal for Delicate Areas
Sometimes, chemicals are too risky, especially on textured grips of controllers or embossed logos on consoles. In these cases, you rely on friction and gentle lifting.
The "eraser method" is surprisingly effective for thin layers of residue. Take a clean, white vinyl eraser. Rub it gently over the adhesive. The friction lifts the glue, which balls up into little strings you can brush away. This takes patience but carries zero risk of chemical damage.
For tougher spots, a razor blade can work, but only if used correctly. Lay the blade flat against the surface-almost parallel to the plastic. Use it to slide under the edge of the sticker or residue. You are not scraping; you are lifting. Keep your thumb on the blade to control the depth. One slip with a vertical angle can scratch a glossy finish instantly. This technique is best reserved for the clear outer jackets of game cases, where a tiny scratch is less visible than on a matte console shell.
Special Considerations for Retro Collectibles
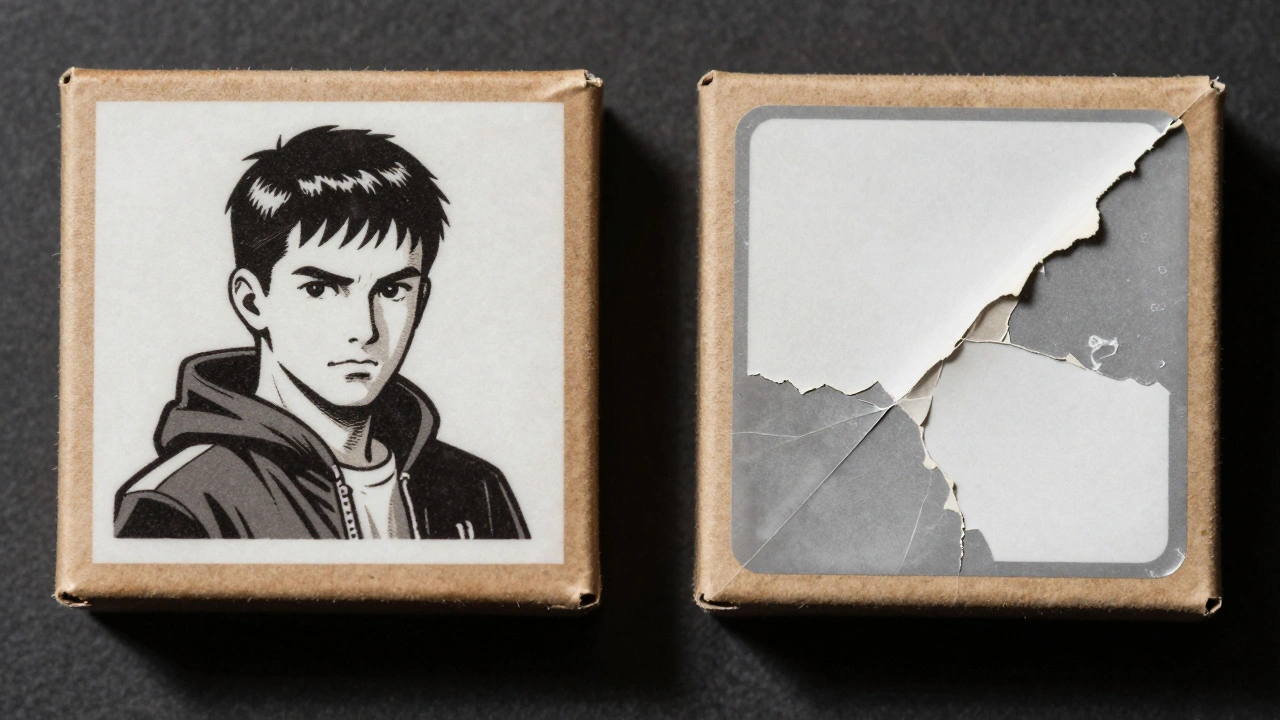
If you are holding a game from the 80s or 90s, pause. The plastics used then were often softer or more chemically reactive than today’s durable polymers. Cardboard boxes are particularly vulnerable. The glue in old stickers has often bonded with the fibers of the paper over decades. Peeling them off frequently takes chunks of the label with them.
Many experienced collectors argue that leaving a faded, aged sticker is better than a damaged label. It proves the item’s history. If you must remove it, treat the box like fragile parchment. Use minimal heat, no liquids, and plenty of patience. If the sticker starts to tear, stop. A partial sticker is often more valuable to a purist than a cleaned-up but scarred surface.
| Surface Type | Safe Methods | Avoid At All Costs |
|---|---|---|
| Glossy Plastic Case Jackets | Hair dryer, Isopropyl Alcohol, Razor Blade (flat) | Acetone (can cloud plastic), Abrasive sponges |
| Matte Console Shells | Damp Microfiber Cloth, Eraser Method | Alcohol (dulls finish), Acetone, Heat Guns |
| Textured Controller Grips | Eraser Method, Mild Soapy Water | Razor Blades, Solvents, Heat |
| Cardboard Box Labels | Minimal Heat, Fingernails Only | Liquids, Acetone, Aggressive Scraping |
Post-Removal Care
Once the sticker and residue are gone, your job isn’t finished. Most solvents leave behind a microscopic film that attracts dust. For plastic surfaces, wipe them down with a dry microfiber cloth. If you used an oil-based cleaner like Goo Gone, follow up with a damp cloth (water only) and then dry thoroughly.
Inspect the area under bright light. Look for haze or whitening, which indicates micro-scratches or chemical stress. If you see this, do not try to buff it out with abrasive polishes. Accept the imperfection or consult a professional restoration service. Better to have a faint mark than a melted surface.
Can I use vinegar to remove stickers from my game console?
White vinegar is a mild acid and can help loosen some adhesives, but it is generally less effective than isopropyl alcohol for stubborn residues. The main risk is moisture. Vinegar is water-based, and if liquid seeps into the vents or buttons of a console, it can cause corrosion or electrical shorts. If you use vinegar, apply it sparingly to a cloth, never directly to the device, and ensure the area dries completely before powering on.
Why did my plastic case turn cloudy after using alcohol?
This is called "crazing." It happens when a solvent penetrates the surface layer of the plastic and causes it to contract slightly, creating microscopic cracks. Isopropyl alcohol usually doesn't cause this, but acetone or strong citrus cleaners often do. Unfortunately, once crazing occurs, it is permanent. You cannot reverse it. Prevention is key: always test solvents on a hidden area first.
Is it worth removing stickers from vintage game boxes?
It depends on the condition of the label underneath. If the sticker is fresh and peels off cleanly, go for it. If the sticker has been there for decades, it has likely bonded with the paper fibers. Removing it may take pieces of the artwork with it. In the collector market, a complete set with an intact, albeit stickered, label is often more valuable than one with a torn or missing section of art. When in doubt, leave it.
What is the safest way to clean a Nintendo Switch dock?
The Nintendo Switch dock has a matte black finish that is prone to scratching and fading. Avoid any harsh chemicals. Use a dry microfiber cloth for dust. For sticky residue, use the eraser method or a barely damp cloth with distilled water. Do not use alcohol or acetone, as they can strip the matte coating, leaving shiny patches that look worn.
Can I use a heat gun instead of a hair dryer?
You can, but it is dangerous for beginners. Heat guns reach much higher temperatures than hair dryers and can melt plastic instantly if held too close or for too long. If you must use a heat gun, set it to the lowest temperature, keep it moving constantly, and maintain a distance of at least six inches. A hair dryer is significantly safer for most home users.