Ever open your storage box and find a controller with a sticky button, a frayed cable, or a joystick that won’t center? It’s not magic-it’s neglect. Controllers and cables take a beating during gameplay, and if you just toss them in a drawer or pile them on a shelf, they’ll break faster than you think. The good news? Simple, smart storage can keep your gear working like new for years-even decades if you’re into retro gaming. You don’t need fancy gear or a big budget. Just a few smart habits.
Why Storage Matters More Than You Think
Controllers aren’t just plastic and buttons. Inside, there are tiny motors, delicate joysticks, pressure-sensitive circuits, and lithium batteries. Leave one in a hot car, wrap its cable too tight, or let dust build up under the analog stick, and you’re asking for trouble. Joystick drift? That’s often caused by humidity or constant pressure on the stick. Button stickiness? That’s sweat, dust, and heat melting the rubber over time. Frayed cables? Usually from being yanked, twisted, or crushed under other gear.
And it’s not just about function. If you collect limited editions, custom-painted controllers, or retro gear, damage lowers value. A scratched Scuf PS4 controller with paddles might lose half its resale price. A cable with exposed wires can short out your console. Storage isn’t just tidy-it’s protective.
Choose the Right Storage Method for Your Setup
Your storage solution should match how you play. Casual gamers? You don’t need a museum-grade case. Hardcore collectors? You need climate control. Here’s what works for each.
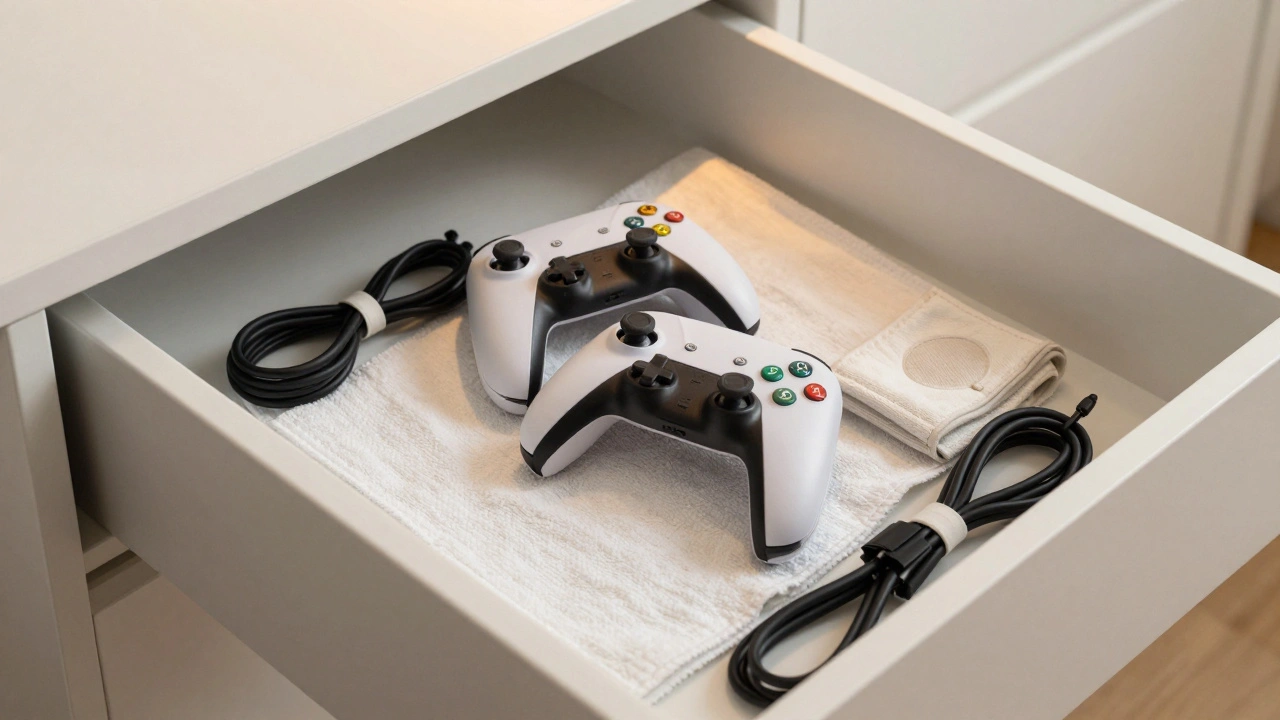
- Casual gamers with 1-3 controllers: A clean drawer works fine. Line it with a microfiber cloth or soft towel. Don’t pile other stuff on top. Store controllers upright or flat, not stacked.
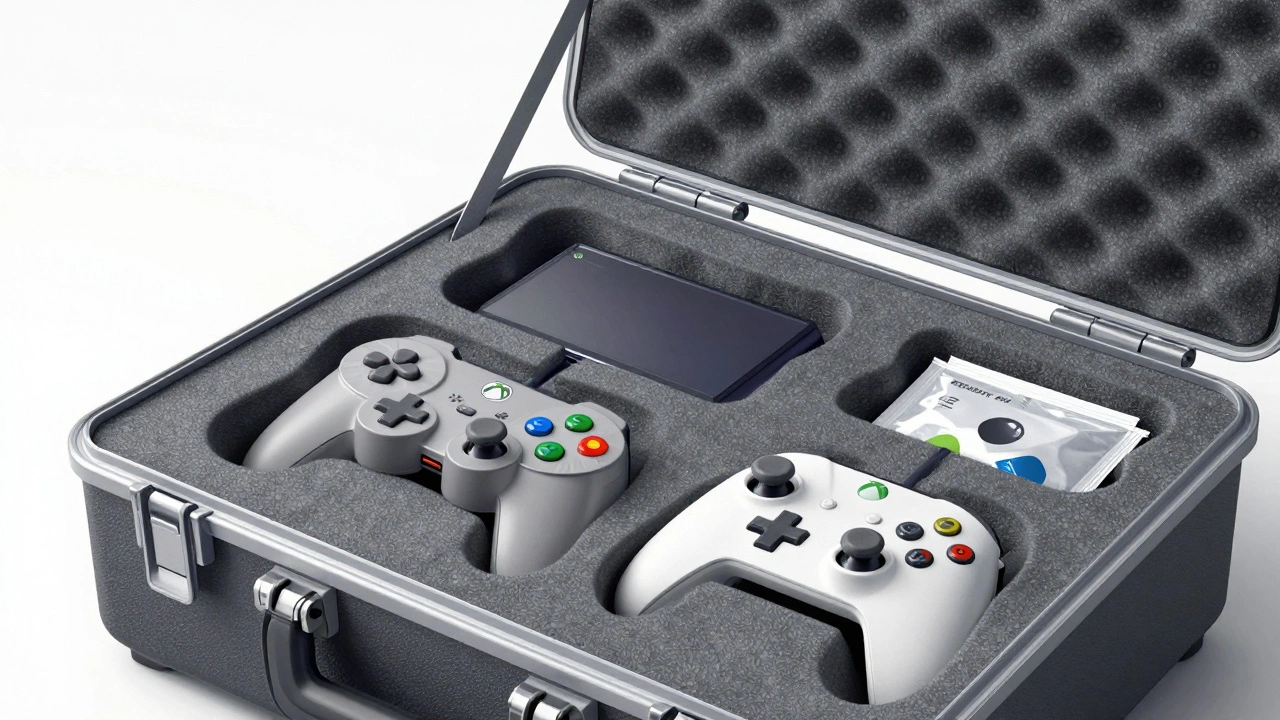
- Enthusiasts with custom or expensive controllers: Invest in a hard-shell case with foam inserts. Brands like Pelican or Storm offer rugged cases with customizable foam. Cut the foam to fit each controller snugly-no room to rattle around. This stops bumps, scratches, and pressure on buttons.
- Collectors with retro gear (NES, PS1, Dreamcast, etc.): Climate control is non-negotiable. Humidity causes corrosion. Heat warps plastic and kills batteries. Store these in a sealed plastic bin with silica gel packets. Keep them away from windows, radiators, and basements. Ideal temp: 60-75°F. Ideal humidity: 30-50%.
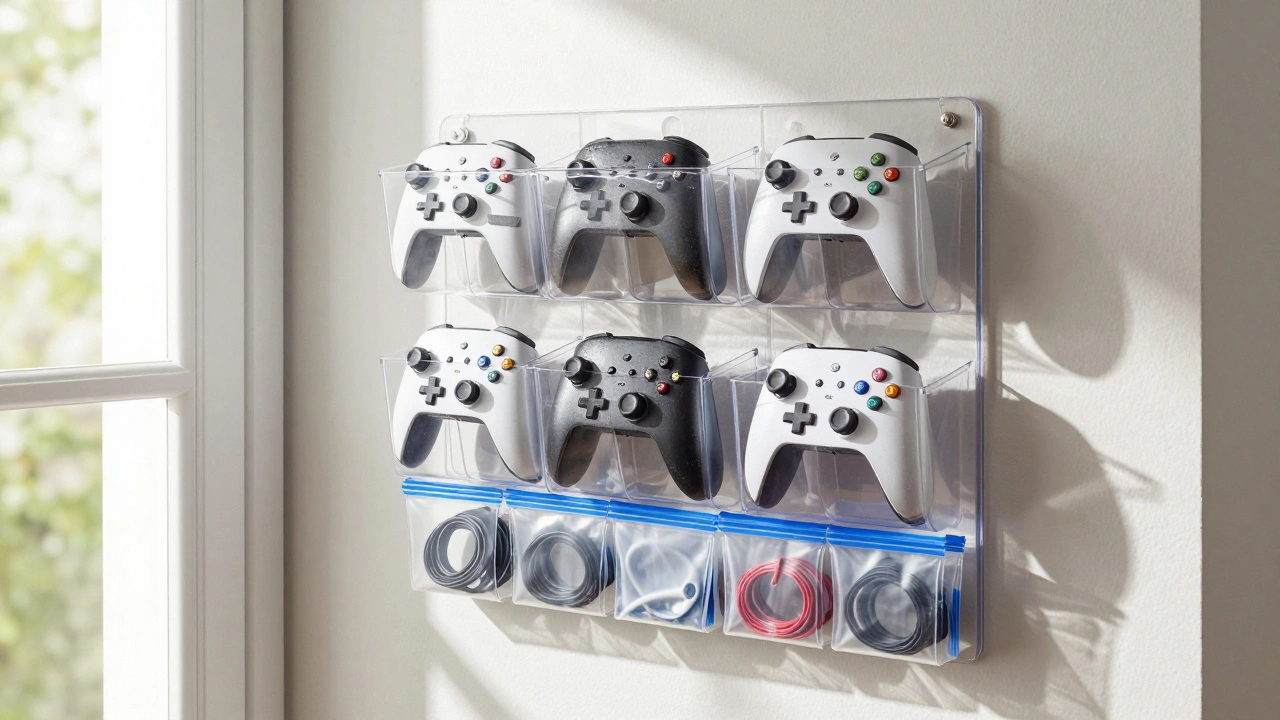
- Players with 5+ controllers: Wall-mounted hooks or a vertical organizer (like a hanging shoe holder) saves space. Use curved hooks with rubber liners to avoid scratches. Label each hook so you know which controller is which.
Cable Care: The Silent Killer
Cables are the most fragile part of your setup. They get bent, twisted, yanked, and crushed. Most fail at the plug end-where the wire meets the connector. Here’s how to fix that.
- Don’t coil tightly. Wrap cables in loose figure-eights. That reduces stress on the inner wires. Avoid the old “wrap-around-the-controller” method-it stretches the cable over time.
- Use cable clips. Velcro ties or plastic clips keep cables bundled without tension. Mount them on a shelf or wall.
- Store cables separately. Put each cable in its own zip-lock bag or small fabric pouch. This stops them from tangling and rubbing against each other.
- Unplug when not in use. Even when the console is off, a plugged-in controller can slowly drain its battery. For wireless controllers, remove the battery if storing for over a month.
Pro tip: If you’re storing a corded controller for months, unplug the cable from the controller first. Then wrap the cable loosely and tape the ends together. That prevents the plug from bending.
Diy Solutions That Actually Work
You don’t have to spend $80 on a storage case. Many of the best solutions cost under $10.
- Custom foam inserts: Buy a $12 EVA foam sheet from a craft store. Trace your controller, cut it out, and glue it into a plastic bin. Add a second layer under the joystick for extra cushioning. Done.
- Velcro storage strips: Stick a strip of Velcro on the inside of a cabinet door. Stick the matching strip on the back of your controller. Hang them up. No scratches. Easy access.
- Shoe organizer hack: Hang a clear plastic shoe organizer on the back of a door. Put one controller in each pocket. Label them with masking tape. You just gained 10 storage spots with zero drilling.
- DIY stand: Glue two wooden blocks into an “L” shape. Slide the controller into the corner. It stays upright, dust-free, and ready to grab.
Retro Gear Needs Special Care
Old controllers and cables aren’t just nostalgic-they’re fragile. Plastic gets brittle. Rubber decomposes. Wires inside insulation crack. Here’s how to handle them.
- Keep them dry. Add silica gel packets to every storage container. They pull moisture out of the air. Replace them every 6 months.
- Don’t clean with water. Use a dry microfiber cloth. For stubborn grime, lightly dampen the cloth with isopropyl alcohol (70% or less). Never spray directly on the controller.
- Store away from sunlight. UV rays fade colors and weaken plastic. Keep retro gear in dark cabinets or covered bins.
- Remove batteries. If storing for more than 3 months, take out AA or AAA batteries. They can leak and corrode the contacts.
- Keep original packaging. If you still have the box, foam, or plastic wrap-keep it. It’s the best protection you’ll ever find.
Long-Term Storage: Prepping for Months or Years
Going on vacation? Moving? Selling your console? Here’s what to do before you pack it up.
- Power off and unplug everything.
- Clean controllers with a dry cloth. Remove dust from joysticks with a soft brush or compressed air.
- Remove batteries from wireless controllers.
- Wrap each controller in a cotton cloth or microfiber bag.
- Place in a sealed plastic bin with silica gel packets.
- Label the bin: “Controllers - PS5, Xbox, Retro.”
- Store on a shelf, not the floor. Moisture rises.
- If using a storage unit, choose climate-controlled. Avoid garages or basements.
And don’t forget the cables. Bundle them, label them, and put each in its own bag. Tangled cables are the #1 reason people give up on old gear.
What to Avoid
Some “helpful” habits are actually damaging:
- Leaving controllers on the couch or bed. Dust, pet hair, and pressure build up. Plus, someone might sit on them.
- Storing near a TV or speaker. Heat and magnetic fields can interfere with electronics.
- Using plastic wrap or cling film. It traps moisture and can stick to plastic surfaces.
- Stacking controllers on top of each other. Pressure on buttons and joysticks causes permanent wear.
- Using rubber bands to bundle cables. They degrade over time and leave sticky residue.
Final Rule: Check and Clean Every 3 Months
Storage isn’t a one-time task. Set a reminder every season. Take out each controller. Wipe it down. Check the cable for fraying. Test the joystick. Make sure the battery still holds a charge. This takes 10 minutes. It can save you $150 on a replacement.
Good storage means fewer repairs. Fewer replacements. More playtime. Your controllers will thank you-years from now, when they still work like they’re brand new.
Should I remove batteries from wireless controllers before storing them?
Yes, especially if you’re storing them for more than a month. Batteries can leak over time, especially in warm or humid environments. Leaked battery acid can corrode the contacts and ruin the controller’s internal circuitry. Remove the batteries, store them separately in a dry place, and put them back in before you plan to use the controller again.
Can I store controllers in a plastic bin?
Yes, but only if it’s sealed and has silica gel packets inside. Plastic bins protect from dust and moisture, but they can trap humidity if left open. Always add at least two silica gel packets per bin. Place them in a cool, dry room-not a garage, attic, or basement.
How do I prevent joystick drift?
Joystick drift is often caused by constant pressure or moisture. To prevent it: never leave the joystick pressed against a surface during storage. Store controllers flat or upright with no weight on the sticks. Use foam inserts that cradle the joystick without squeezing it. Keep the storage area dry and cool. If drift already exists, cleaning the joystick with isopropyl alcohol might help-but replacement is often the only fix.
Is it safe to store controllers in a car?
No. Cars get extremely hot in summer and freezing cold in winter. Temperatures over 100°F can warp plastic, melt button rubber, and kill lithium batteries. Even in winter, condensation forms inside the controller when you bring it inside. Always store controllers indoors, in a stable environment.
What’s the best way to organize cables from multiple controllers?
Use individual zip-lock bags or small fabric pouches for each cable. Label them with a marker: “PS5 Charging,” “Xbox One,” etc. Then bundle the bags together with a Velcro strap or place them in a small bin. This prevents tangling and makes it easy to find the right cable. Avoid rubber bands-they degrade and leave sticky gunk.